Tuesday 30 September 2014

The 6 Biggest Bathroom Trends Of 2015 Are What We've Been Waiting For -

The 6 Biggest Bathroom Trends Of 2015 Are What We've Been Waiting For -

This year, the kitchen as we know it completely changed. Shelving opened up, cabinets went darker and metallic accents moved well beyond cabinet knobs. But come 2015, we can expect to see a major overhaul in a different room of the house -- the bathroom. Everything from sinks and color schemes to tubs and tiles will see some sort of upgrade, according to the National Kitchen and Bath Association's style report as well as the trends we've seen in the decor sphere, and this is how we expect interior designers and homeowners everywhere to go about it...
Out With The Old: Coastal Cottage Style
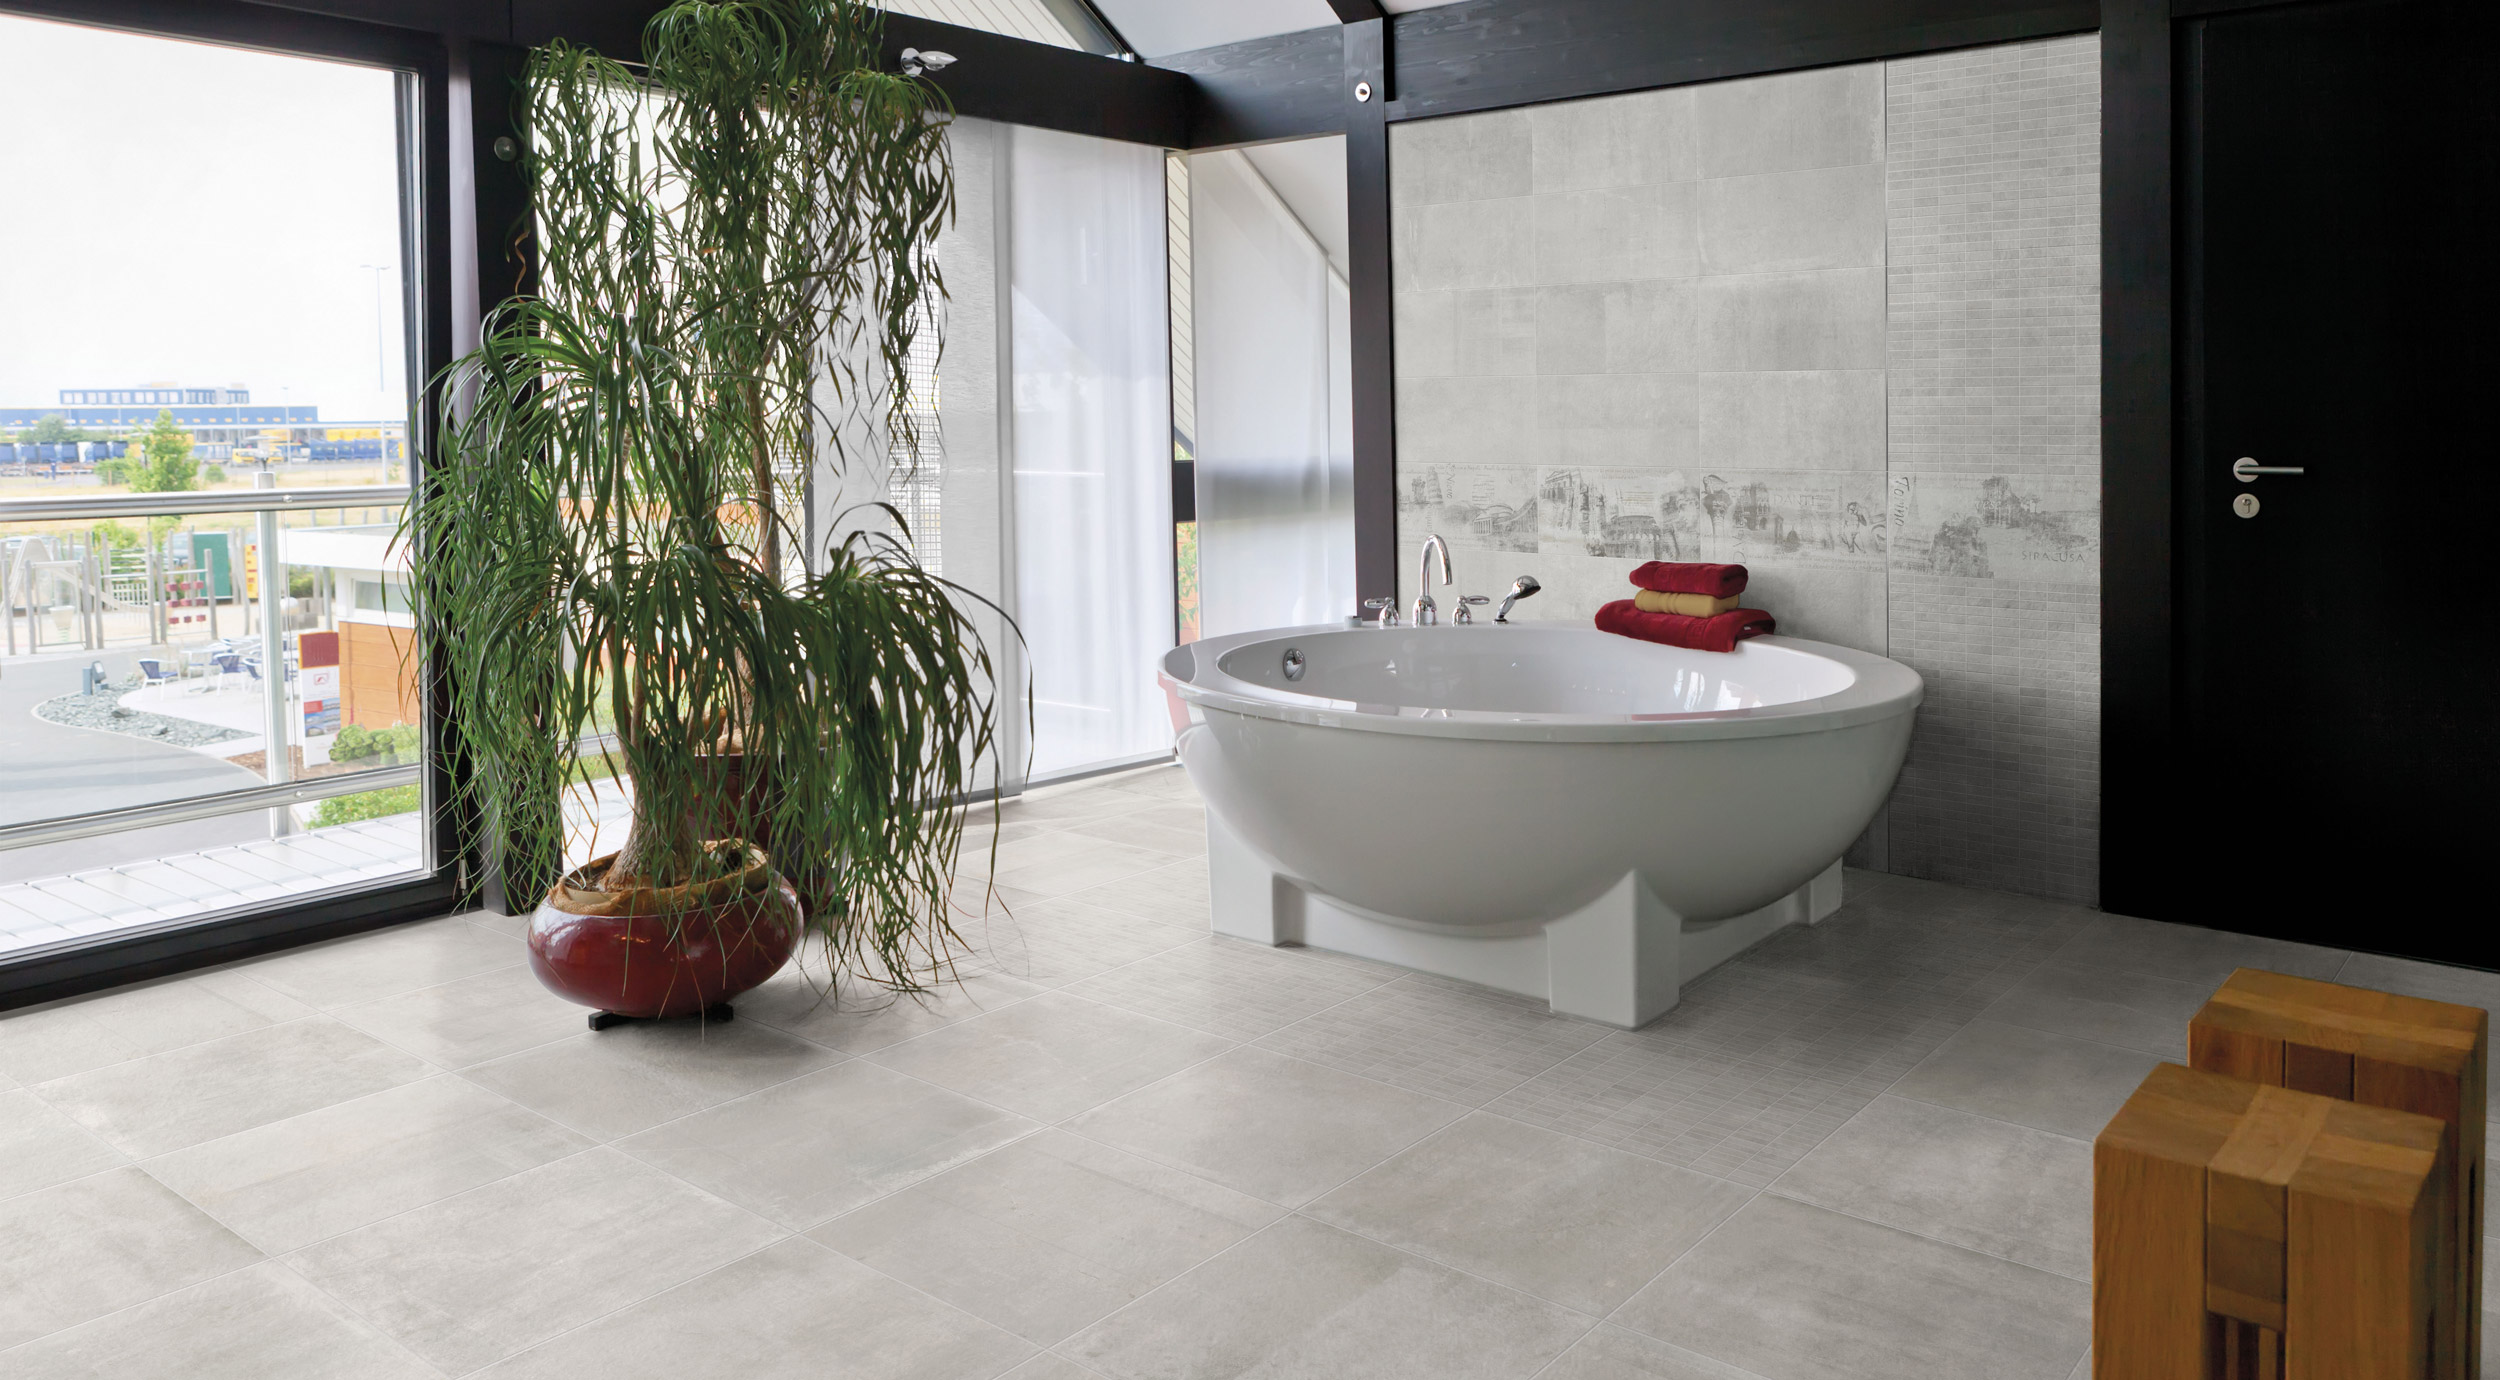
In With The New: Clean Contemporary
According to the National Kitchen and Bath Association's style report, more than 400 designers agreed there is a move toward simplicity in a cleaner, more contemporary way. That's not to say they are going to completely lose their more cozy, rustic charm for all-out glamour, but they will have cleaner lines and more minimalist modern vibe.
contemporary bathroom
Out With The Old: Rain Showers
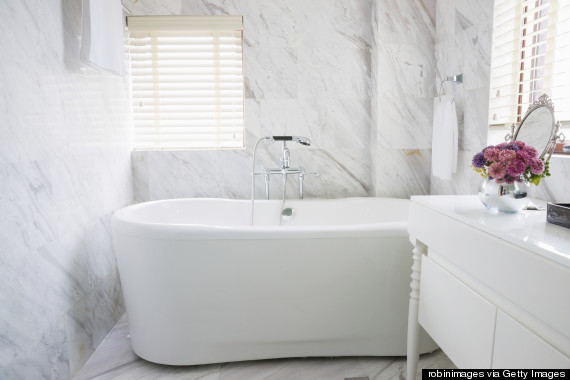
In With The New: Soaking Tubs
Forget about glass-encased showers -- these days it's all about the soaking and free-standing tubs, so much so that we can actually expect a decline in standard tubs with shower-surrounds.
contemporary bathtub
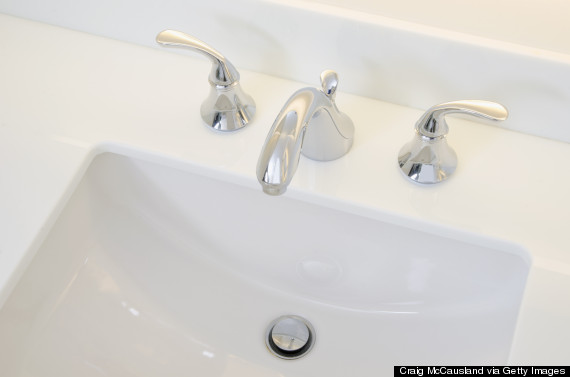
Out With The Old: Bowl Sinks On Cabinets
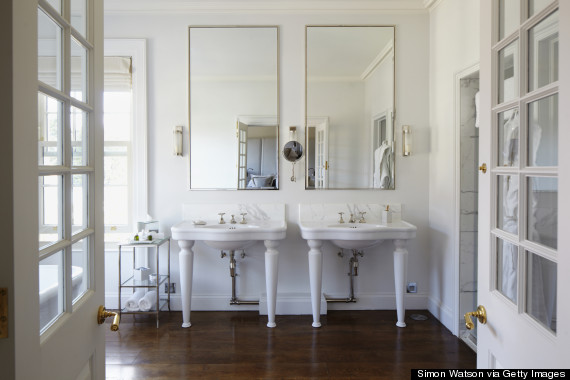
In With The New: Under-Mounted Leggy Sinks
Looks like you're going to have to find somewhere else to stash those toiletries, because under the sink won't be a "trendy" choice next year. Also not so "in" anymore? Those bowl-shaped sinks we loved a few years back.
contemporary bathroom
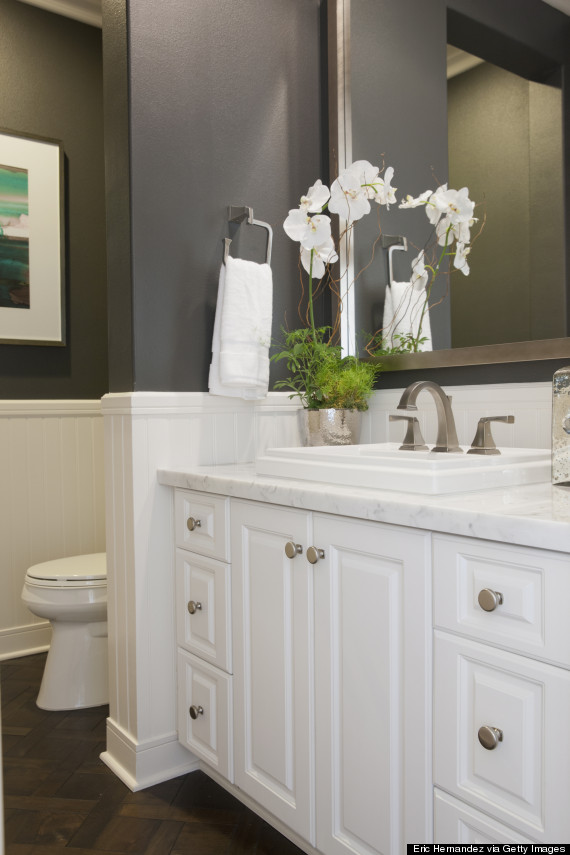
Out With The Old: White Paint
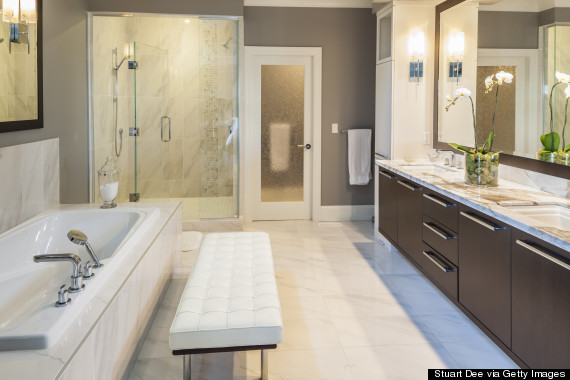
In With The New: Shades Of Gray
Say sayonara to all the white. While it's still an incredibly popular choice for bathroom colors (along with blue and beige), the National Kitchen and Bath Association also found it to be the fastest-growing shade for the bathroom.
gray bathroom home decor
Out With The Old: Granite Vanities
In With The New: Quartz Countertops
Despite what you may think from watching all that HGTV, there are options out there besides granite. Quartz, a huge player for 2015, is one of them.
quartz countertops
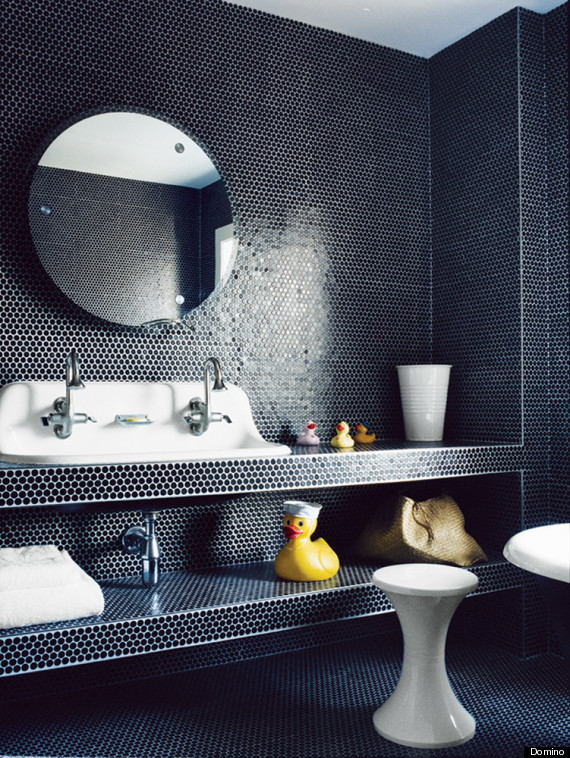
Out With The Old: White Subway Tile
In With The New: Sleek, Black Tiles
Why let kitchens have all the fun with the dark, moodier features? Those trends are here to stay so skip the subway tile and opt for something bolder.
contemporary bathtub

Stop by our store and have a look! 
or - Give us a call @ 905-892-5756 and we will provide a free estimate.

Thursday 17 July 2014

Concrete-Look Ceramics for an Industrial Look -

Concrete-Look Ceramics for an Industrial Look -

Inspired by disused warehouses, abandoned factories and industrial buildings, this is a style that gives a contemporary makeover with an urban twist to your home.
What solutions for floors and walls are best for creating this kind of look?
This is a trend that has its roots in the US building styles of the 1950s, adopted with conviction also in Europe from the 1970s onwards, and it derives from constructions once used for industrial manufacturing or material storage.
It first took hold in the Big Apple for practical, functional reasons rather than as a question of style, and the intention was to recover abandoned premises and turn them into residential complexes. Large, open-plan constructions with high ceilings and large windows were the hallmarks of such homes, which were soon settled in by artists and members of US bohemian society. An example? The Factory of Andy Warhol, which generated a host of artistic and cultural stimuli under the aegis of pop art.

This new industrial revolution soon spread like wildfire, and Europe has also been won over by its vintage allure and the rough-look ambience created by open-beam structures, pale-coloured plaster, bricks and resins.
To give a contemporary touch to your home, go for furniture with an aged look, created using materials such as iron and wood.
Simple, recycled pieces combine marvellously with standing lamps and suspension spotlights. Soft leather sofas positioned close to a cast-iron stoves, details and accessories picked up at antiques markets – all these are ideal solutions for the sitting room.
In the kitchen, the best choice to go for is clearly visible worktops, with a wood or plywood top dinner table.

AND WHAT ABOUT THE FLOORS AND WALLS?
For an authentic industrial-style penthouse, the ideal choice is a porcelain stoneware floor that mimics the effect of stone slabs and time-worn concrete.
The tiles enhance all the allure of a floor worn down by the passage of time and footsteps, and are the perfect complement to an urban, metropolitan look. They come in colours like almond, black, light, gray, olive and sand.
Ideal for both residential and public areas, these ceramic tiles look magnificent with minimalist-style interior design elements.


Stop by our store and have a look! 
or - Give us a call @ 905-892-5756 and we will provide a free estimate.

Wednesday 23 April 2014

Shower Tile Basics or Shower Tile 101

Shower Tile Basics or Shower Tile 101


Leaks

First and foremost – tile is not waterproof. Grout is not waterproof. Adding sealer to your tile or stone will not make it waterproof. Your shower should be completely waterproof before a box of tile is even opened! No matter which waterproofing method you choose, proper substrate preparation is the only thing that will make your shower waterproof.

If you have a leak in your shower – stop using it immediately if at all possible. If that is not possible (it’s your only shower) have the shower repaired – immediately. If you see water leaking it is likely not nearly as much water as you don’t see leaking into your wall cavity and structural framing. By the time you ‘see’ most leaks the framing is normally already considerably compromised.

No, there is nothing you can put over your tile to make your shower waterproof if you have a leak – not even sealer. A tile or stone sealer is made to make your tile and grout stain-resistant, not waterproof. It does this by sealing the pores of the tile and stone to slow (NOT STOP) the absorption of liquid and prevent staining. It only means you have more time to clean up the spilled red wine cherry kool-aid before it stains anything.

Substrates

Drywall is not an acceptable substrate for your shower. Use a waterproofing membrane – that’s it. Cement backerboards are the standard and there are also other products such as waterproofed, gypsum based boards like Denshield and waterproofed, foam-based sheets like wedi or kerdi board.

Cement backerboards are not waterproof. They are water stable, which simply means that they will not swell or disintegrate when exposed to moisture or water – they won’t change size. But they are just like your driveway, they will soak in water, hold water, and dry out, just like your driveway when it rains. If using backerboards there needs to be a waterproof membrane utilized as well.

Membranes

If you are using a topical waterproofing membrane such as a liquid like hydroban, or a sheet like kerdi, do not use a moisture or vapor barrier behind your substrate. If you have a vapor or moisture barrier behind your substrate do not use a topical membrane on the front of it. This combination creates two waterproof barriers with your substrate sandwiched between them. any vapor or moisture trapped between them has absolutely no way to dissipate. This is lovingly referred to as a ‘mold sandwich’. It is not tasty. Use either a moisture or vapor barrier behind your substrate or a topical membrane on the face of it. One or the other – never both.

If you are using a topical membrane and you have an exterior wall with either plastic facing or kraft paper facing you need to cut slits into that facing before installing your substrate. If you do not it will create the aforementioned mold sandwich. Give moisture or vapor somewhere to dissipate.

Shower-tub transitions

There should be a gap between your tub or acrylic shower base and the bottom of your backerboard. If you are using a traditional barrier waterproofing method you do not need to do anything with this gap. Do not fill it with silicone! This will trap moisture running down your barrier and it will have nowhere to go. If you are using a topical method you can fill it with silicone if you want. If you are using liquid you should fill it with silicone. This creates a waterproof plane between your membrane and the tub or base so water or moisture ends up in the drain rather than in your wall.

When you tile you can tile right over that gap. You should not fill this gap with thinset behind the tile – it will crack due to movement. Your wall and tub or base will expand and contract at different rates – it will crack any cement-based product you place between the two. This includes thinset as well as grout. You do not need a solid backing behind your tile over this gap – it should be less than 1″ wide. You shouldn’t normally be walking on that tile in that particular spot. Yes, it can just hang there.

Grout

If your grout is cracking it is due to movement 99.9% of the time. Type ‘cracking’ into the search box up there and you’ll find in-depth explanations.

If you have white, or lighter than normal grout when you’re finished grouting it may be efflorescence. This is mainly due to minerals in the water being left on the surface of the grout when the water evaporates. It is usually indicative of either incorrectly mixed grout or using too much water while cleaning the grout – not wringing out your sponge enough. This is normally only on the surface of your grout. Scratch the very top layer of your grout in an inconspicuous spot with your fingernail. If you have the correct, or at least a darker, color beneath the surface that is the likely cause. The easiest, quickest fix, provided it is only the very top layer, is to get some drywall sanding sponges and go over the grout lines very lightly. Just like burnt toast – scrape it to the color you like.


Give us a call @ 905-892-5756 and we will provide a free estimate.

Thursday 20 February 2014

Hardwood Gapping

Hardwood Gapping


Here is some knowledge to pass on. After surviving the winter heating months which may last for several
months’ wood floors tend to shrink or gap as a direct result of the heat running - a direct result of low
Relative Humidity within the home. Furnaces tend to dry the air out and in turn the wood will dry out.
Because of this the wood industry recommend to maintain the relative humidity within a home
or building between 35%-55% and in doing so will minimize the expansion and contraction of the wood
floors. In some areas of the country whether due to low humidity in the region or because of extended
heating seasons a humidification system may be needed to help maintain the humidity within the
structure. The good news is that once we move out of the heating season the relative humidity typically
will go back up and the wood will gain some moisture that is now found within the air and the gaps will
close back up. This is known as seasonal gapping and is normal for wood floors.


What does this mean to you? Typically we see receive more calls for gapping complaints at the end of
the winter months, and hopefully this will give you and your customers a better understanding of why
this happens. Remember that wood is hygroscopic – meaning that when exposed to air wood will either
gain or lose moisture until it is in equilibrium with the temperature and humidity of the air. Additionally
different species of wood will expand or contract at different rates due to their coefficient of expansion.
Hickory has a higher coefficient than Oak or Maple. Lastly the wider the plank the more expansion or
contraction is to be expected when the humidity becomes higher or lower.
To help combat low humidity there are a number of suggestions to help prevent the wood from drying
out in the winter months
 

1. Humidifier
2. Boiling water on the stove
3. Opening the dishwasher at the end of the wash cycle
4. Purchasing a hygrometer to monitor the relative humidity within the home


Moisture content of wood

Thursday 13 February 2014

Countertops


Question -

I have my heart set on white-and-grey marble counters, but everyone tells me marble is a bad idea. I know you use marble all the time. I’ve heard it stains and chips. Why then are the majority of designer kitchens on Pinterest marble? Alternatives? Thoughts?

Answer -

Marble is porous and stains. Nevertheless, I’ve used it in several homes, including my own. With marble, particularly Carrera, you have to let go of the idea that your countertop will remain perfect.

Like you, I had to have marble, and for the first couple of months at dinner parties, I would follow guests who were drinking red wine into my kitchen and try to look inconspicuous as I placed cocktail napkins under their glasses. I also banned lemons from the counter. Ridiculous, I know. With the first stain, my heart pounded so fast I thought it would fly out of my mouth (and stain the countertop!), but after the olive oil and coffee stains, the counter looked and felt less precious. On the bright side, the stains, or “patina,” make it look like I actually cook.

What I’m saying is, if you’re looking for a flawless countertop, don’t choose marble.

In fact, many countertop fabricators will try to dissuade you from using it because it needs to be sealed every three to six months and they know people can’t handle the stains, scratches and chips.

These days, however, because marble alternatives look so real, what you’re looking at may not even be marble. Let’s take a survey of some of the look-alikes.

Jonathan Wheeler of Latitude Countertops suggests light granite but favours Quartzite as a marble alternative. “Quartzite is a natural stone and the colour has varying tones of grey and white that looks like marble, but has a durability that’s similar to granite; because it’s less porous it’s less likely to stain, scratch and chip,” he says.

Quartz, such as Caesarstone, Silestone, Cambria and Hanstone, is made from 90% ground quartz and 10% acrylic resins. This man-made material feels like natural stone, as it’s cool to touch, but it’s non-porous, durable and easy to maintain. It doesn’t stain, chip or require sealing.

Because marble alternatives look so real, what you’re looking at may not even be marble

Quartz countertops come in many colours and patterns, including excellent marble facsimiles. “One of the big pros of quartz is the uniform veining that helps to make the seams less visible” Mr. Wheeler says. (With marble, “the direction of the veins have to match, otherwise your counter will look busy and the seams will become more obvious,” he says.)

Acrylic countertops (also known as solid-surfacing material), such as Staron and Corian, are non-porous, seamless and easy to maintain. Scratches and mild burn marks can be buffed out. But the thermal shock of a hot pan on cold acrylic or quartz may crack the countertop and void its warranty. Acrylic countertops don’t feel like natural stone, but the look is pretty close. The cost starts at $65/sq. ft. installed.

But if you’re absolutely set on having marble, you may want to boost your budget: More expensive varieties of marble — such as Calacatta, which has grey and brown veining, and Statuario, which is pure white with grey veins — are not as porous as Carerra, and so stain less.

There is a lot of debate over honed versus polished marble. I find that designers prefer honed marble for its smooth matte finish. Because honed marble isn’t reflective, scratches, water marks and finger prints are less obvious. Countertop fabricators, on the other hand, are typically pro-polished marble. Polishing marble gives it a glossy finish that’s less porous and therefore less prone to staining.

When I want to add raw and organic touch to a space, I choose honed. For a little glimmer, I prefer polished.

Another option you may want to consider is using a marble backsplash tile to get the look you’re after (see the backsplash in the photo above, right), but pair it with a grey quartz countertop for practicality.

To test stain tolerance (both yours and the marble’s), consider buying a 10-inch piece of marble. Seal one side, and then pour coffee, tea and red wine on it to see what happens.

Happy countertop shopping.

Give us a call @ 905-892-5756 and we will provide a free estimate.

Gayle Baltjes-Chataway